Feeds:
Posts
Comments

Archive for November, 2009

Thanksgiving 2009

From now until Christmas is all about tradition.  Even though it’s always a packed season, I love that this time of year brings people together in ways that we don’t always prioritize the rest of the year.

As always, we started out our Thanksgiving celebration early, with a Thanksgiving dinner with friends.  This has become a tradition over the past 3 or 4 years that I love.  Generally, holidays are reserved for family  and I love that this tradition allows us to celebrate with friends who are really meaningful to us as well.  Eric and Emily did a great job of hosting, with cute little Thanksgiving decorations all around and a laid-back atmosphere.

We then hosted Thanksgiving Day at our house.  It’s always been a big blessing that all of Nate’s siblings live in the area.  We don’t get together as often as we might like, but it means that family is near when the big stuff comes.  And as my sister and her husband have done in the past, they were gracious enough to drive 11 hours from Oklahoma to spend the long weekend with us as well.

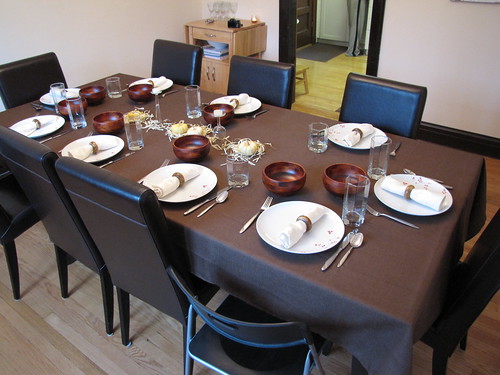
(Almost ready for people to arrive, before the chaos starts!)

(Kimber and Nate handled the turkey beautifully, while I stayed mostly on the raw poultry sidelines.  Nate has become quite the proficient carver, from our first Thanksgiving when I remember cleaning shredded turkey meat off the walls and cabinet for a week.)
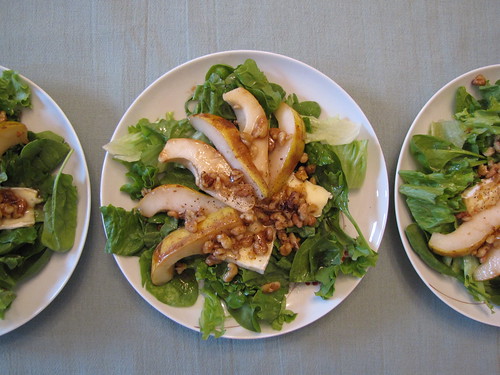
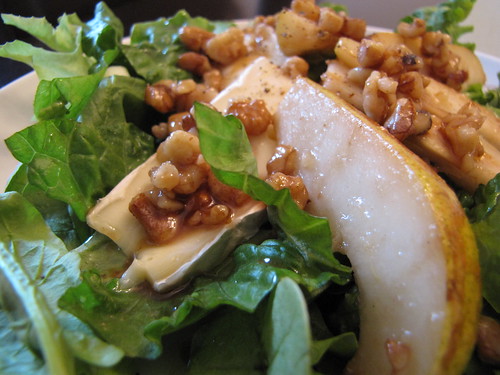
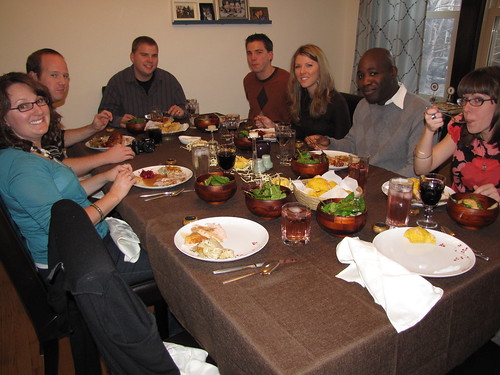
(Dinner together)

Kim and FP were able to get here earlier this year than in the past.  Usually they roll in at about 3am on Thanksgiving morning.  It was really nice to have them show up at 7pm the night before and have a little time together before an exhausting day of cooking, hosting, and cleaning.  It was still an exhausting day for me and I appreciated Kim’s help a lot.  It’s nice that she’s my sister and I can depend on her to just take charge of something when I need it.

We spend Friday doing what every crazy American does: shopping.  However, we decided to forgo the early bird rush.  Instead we woke up at our leisure and didn’t actually get out to the mall til 12pm.  Still, we had some definite shopping success for Christmas gifts, house items for Kim, and maternity clothes for me.  Seven hours later, we headed back to the city and I rewarded all of my standing and walking with dinner in front of a movie.

Saturday we spent the morning at Trader Joe’s and a gourmet grocery store.  (Yes, this is considered a fun event in the Jordan family.)  We then came home and made a big brunch before heading downtown for more sightseeing and walking.  We planned to do the Sears Tower Sky Ledge, but skipped it after finding out it was a two-hour line.  We headed to the Christkringle market, a German Christmas market packed with kitschy items no one should buy and way too many people.  After that it was, yes, more shopping on State Street followed by an early dinner in the West Loop at an Indian Restaurant.  FP loves naan so he was happy.  Nate and I both confirmed that we really don’t like Indian food, but I was glad we gave it one more try!  Dinner led to a walk up to north Michigan Avenue for beignets and cheesecake for dessert overlooking the Mag Mile.

In total, we walked about 5 miles on Saturday and I determined that is the last time I’ll do that for the next 4.5 months.  Nobody told me that pregnancy makes you feel like you have the body of a 100-year-old.  If you push too hard, you can’t just sleep it off.  The next day you just wake up 100 or like a brand new cowboy on his first cross-country ride.  I’m realizing that I’m going to have to slow down now, yet I’m not sure how I can do it without letting things drop.  Oh and let me note for now and any other time I decide to be pregnant that I should never, ever plan a trip to a foreign country during that time.  This weekend, I spent more time than I care to count waiting in bathroom lines.  I can’t imagine how much worse it would be in a location that has far less commodities readily available.

Despite feeling like a Grandma, it was a great weekend and I so appreciate Kim and FP making the effort to come and see us semi-regularly.  Because we have lived so far apart since Kim’s marriage, we have never had an extended period to get to know FP well.  Our trip to Panama was the most time we’d ever spent with him.  I liked realizing this Thanksgiving our time in Panama and their effort to come our way and spend time when we can is paying off and now he just feels like “one of us.”

Read Full Post »

Happy Thanksgiving!  (And a non-Thanksgiving dish for you …)

I’m in love with orecchiette.  Something about then looks so much more elegant and enticing than say elbow macaroni or mostaccioli.  It’s possible that I choose recipes just for their inclusion of this sweet little ear-shaped pasta.  I don’t know why I do this, though, because I have NEVER once found orecchiette at any of my grocery stores.  They are simply nonexistent.  There is cavatelli, shells, linguine, fettucine, and angel hair.  And even sometimes campanelle, which is what I substituted with in this case, but never my beloved orecchiette.  Oh I know they exist.  They exist at those little, kitschy gourmet food stores for $8/lb. but I’ve got principles that keep me from that ludicrousness.    And so I pick recipes for their cute little orecchiette and end up with pasta made from campanelle.

I’d give this recipe mixed reviews.  I liked that it highlights some lesser-used ingredients for pasta.  It’s got all the elements needed to pack some major flavor punch.  And yet it just didn’t quite get there.  I expected an explosion of flavors in my mouth and what I got was good pasta instead of great pasta.  I don’t think this recipe is dead, though, so if it appeals to you I’d encourage you to play around.

I think if I tried it again I’d do two things differently.  First, I would not mince the shallots.  I’d keep them in long stringy strips and sauté them until thoroughly caramelized.  (I don’t even eat onions, but I love the flavor enhancement that they give and know that many others consider them a real treat.)  Second, I would greatly enhance the lemon flavor.  Adding some lemon zest to the cream sauce and then upping the amount of fresh lemon juice at the end.

Orecchiette with Brussels Sprouts, Gorgonzola, and Brown-Butter Pecans
From Fine Cooking 102, pp. 107
Serves 4-6

Kosher salt
20 oz. Brussels sprouts, trimmed (4 cups)
3-1/2 Tbs. extra-virgin olive oil
Freshly ground black pepper
1 lb. dried orecchiette
1-1/2 Tbs. unsalted butter
1/2 cup coarsely chopped pecans
2 large shallots, minced (3/4 cup)
3/4 cup heavy cream
4 oz. Gorgonzola, crumbled (1 cup)
1 Tbs. fresh lemon juice

Position a rack in the lower third of the oven, set a heavy rimmed baking sheet on the rack, and heat the oven to 500°F. Bring a large pot of well-salted water to a boil over high heat.

In a food processor fitted with the medium (4 mm) slicing disk, slice the Brussels sprouts. Transfer them to a large bowl, drizzle with the oil, sprinkle with 1-1/4 tsp. salt and 1/2 tsp. pepper, and toss until well coated. Remove the hot baking sheet from the oven and spread the Brussels sprouts on it in a single layer. Roast, stirring once about halfway through the cooking time, until the Brussels sprouts are tender and flecked with charred bits, 15 to 20 minutes.

Meanwhile, cook the orecchiette according to package directions until just al dente.

In a medium heavy-duty skillet, melt 1/2 Tbs. of the butter over medium heat. Add the pecans and cook, stirring frequently, until the butter is deeply browned and the pecans are toasted, about 3 minutes. Transfer to a plate and set aside.

Melt the remaining 1 Tbs. butter in the skillet over medium heat. Add the shallots and cook, stirring occasionally, until softened, 2 to 3 minutes. Add the cream and bring to a simmer. Off the heat, add 3 oz. (3/4 cup) of the Gorgonzola and stir until melted.

Drain the orecchiette and return it to the pot. Add the Brussels sprouts, Gorgonzola sauce, and lemon juice and toss well. Serve, sprinkled with the pecans and the remaining Gorgonzola.

Read Full Post »

Whether it be because these nights I’ve got twenty minutes start to finish to throw dinner together or because I’ve been missing my weekly trips to the fruit market in order to sleep later, I have been seriously neglecting my leafy greens.  So when I made this salad, I almost cried of happiness.  I don’t know if that’s because it is just that good or if it’s because it was salad at all.  All I know is that I finished my salad before Nate and that never happens.  Which probably means I should apologize to that lunch guest for my furious crunching and shoveling at the dinner table.

I made something similar over a year ago that capitalized on caramelized pears and prosciutto.  Combining the caramelized pears with brie is another way to introduce a salty essence to what could become sickly sweet on its own.  I found the creamy texture of the cheese a welcome addition.

Caramelized Pear Salad with Walnuts and Brie

Adapted from onceuponaplate.blogspot.com, recipe adapted from Donna Hay
4 servings

Ingredients:

2 tablespoons butter
3 tablespoons white wine vinegar
1 tablespoon brown sugar
2 firm pears, quartered and cored
1/3 cup walnuts
1 bag (about 5 ounces) arugula leaves, spring or field greens
About 4 to 5 ounces Brie, Camembert, or soft blue cheese, sliced

Place butter, vinegar and sugar in a frying pan over medium heat. Add the pear and walnuts and cook for 4 minutes or until the pear is just soft.  (I suggest placing the first 3 ingredients in the pan and heating until they have just started to caramelize.  Then add the pears and walnuts.  This ensures non-soggy pears, which I hate!)

Place the arugula or field greens on serving plates and top with the pear and walnuts. Spoon over the pan juices and top with the cheese.  (I then did a delicate drizzle of white wine vinegar around the rim of the greens because I like a bite to my dressing.)

Read Full Post »

I started these cookies at the same time I started a phone conversation with my mom.  I got a beep halfway through letting me know my sister was trying to call me too.  I finished the cookie part of the recipe as I hung up with my mom, an hour and ten minutes later.  I dialed my sister back and started on the filling ingredients, chatting, licking, and measuring all at once.  Halfway through my conversation with my sister Nate came in to askwhen I might be off the phone and done with these cookies because he needed my help – like an hour ago! By the time I hung up with Kim and was scraping the last of the filling onto the final cookie it had taken me close to two hours to make these cookies and two hours of being in queue for Nate to get his turn.  Woops.  I’m pretty sure these cookies don’t actually take two hours to make, except when your concentration is completely and totally elsewhere.

(Mental note: dust table more regularly)

So I did a quick proofread for Nate and then humbly him offered two, large sandwich cookies and a glass of milk.  Luckily these cookies are utterly decadent (and filling!) and forgiveness was very forthcoming.  Well, that and the fact that the cookies came along with a 3-hour sit down to watch his Colts beat the Patriots with a last-minute victory.

Peanut Butter Sandwich Cookies
From Fine Cooking 43, pp. 54-55
Yields eighteen 2-1/2-inch sandwiches

For the cookies:
6 oz. (1-1/3 cups) all-purpose flour
2 oz. (2/3 cup) cake flour
1/2 tsp. baking soda
1/4 tsp. salt
6 oz. (12 Tbs.) unsalted butter, completely softened at room temperature
3/4 cup smooth peanut butter
1/2 cup sugar
1/2 cup firmly packed light brown sugar
1 tsp. pure vanilla extract
1 large egg

For the filling:
1-1/2 cups confectioners’ sugar
3 oz. (6 Tbs.) unsalted butter, softened at room temperature
3/4 cup smooth peanut butter
3 Tbs. heavy cream
1/4 cup coarsely chopped roasted unsalted peanuts
1/4 cup coarsely chopped semisweet chocolate, or mini semisweet chocolate chips


To make the cookies

Heat the oven to 350°F. Line two baking sheets with parchment. In a medium bowl, sift together the two flours, baking soda, and salt. In the bowl of an electric mixer, cream the butter, peanut butter, and sugars with the paddle attachment until light and fluffy. Add the vanilla and egg; continue creaming until smooth and fluffy, about 3 min. with an electric mixer (longer by hand). Stir in the flour mixture by hand just until it’s incorporated; don’t overmix or the cookies will be tough. Drop heaping tablespoonfuls of batter, spaced about 2 inches apart, onto the lined baking sheets. With floured fingers, flatten each dab of batter into a 2-inch round. Bake until the cookies are puffed and golden, 11 to 13 min., rotating the baking sheets if needed for even baking. Transfer the cookies to a rack to cool.

While the cookies cool, make the filling

In a small bowl, cream the confectioners’ sugar, butter, and peanut butter until smooth. Add the heavy cream; continue creaming until smooth and fluffy. Stir in the chopped peanuts and chocolate.

To assemble

Transfer the cooled cookies to a work surface, flipping half of them over. With an offset spatula or a butter knife, spread a scant teaspoon of filling onto each turned-over cookie. Set another wafer on top of each filled cookie, pressing gently to spread the filling. Store sealed at room temperature or in the refrigerator.

Read Full Post »

After finally finishing off all the pots of leftover soup from Soup Night, which were much needed during a week when sit-down dinners were nonexistent, it was time for something different.  And by different I mostly mean a fresh, home cooked meal placed on a real plate, on a real dinner table.  I was happy to get into the kitchen and pull out my favorite knife.  Nate was happy to eat anything that didn’t consist mainly of liquid and microwaving.

The whole time I was prepping this recipe it kept sending me to the Olive Garden.  It must have been the combination of garlic and parmesan that brought this to mind, though I use this particular combination quite frequently.  Either way, I am happy to report that this dish does not end up tasting anything like the pre-fabbed meals that are served at the Olive Garden.  It was intensely flavorful and aromatic, infused with the sweetness of the sundried tomatoes and balsamic reduction, and the tanginess of the artichokes and goat cheese.  It’s the kind of dish that makes you realize vegetarianism is not the saddest plight to happen.  (Well, at least for the night.  Until you come across a recipe for cranberry-glazed, bacon-wrapped apricots.  Then you remember how glad you are that you aren’t vegetarian, that your husband isn’t vegetarian, and that no one in your immediate families is vegetarian.)

Stuffed Portobello with Balsamic Reduction
Adapted from loveandoliveoil.com.  Originally adapted from Epicurious.

Makes 4 servings.

Ingredients
4 cups fresh spinach leaves
2 tablespoons olive oil
1 cup chopped sweet onion
3 garlic cloves, minced
1/4 cup sundried tomatoes, chopped
1/3 cup marinated artichoke hearts, drained and chopped
1/4 cup plus 6 tablespoons finely grated Parmesan cheese
4-ounces soft fresh goat cheese, crumbled
1/4 cup unseasoned dry breadcrumbs
salt and pepper, to taste

4-6 portobello mushroom caps

1/2 cup balsamic vinegar
1 sprig fresh thyme

Directions

Heat oil in heavy large skillet over high heat. Add onion; sauté until beginning to brown, stirring often, about 3 minutes. Add spinach and stir until wilted.  Add garlic and stir 30 seconds. Chop and transfer to large bowl; cool to room temperature.

Add spinach, 1/4 cup Parmesan, sundried tomato, artichoke, goat cheese, and breadcrumbs to onion mixture; toss to distribute evenly. Season filling to taste with salt and pepper. DO AHEAD: Can be made 2 hours ahead. Cover filling and let stand at room temperature.

To make balsamic reduction, combine vinegar and thyme sprig and simmer for 10-15 minutes or until reduced by half. Mixture should be thick and syrupy. Simmer longer if necessary. Set aside.

Preheat oven to 400°F. Transfer mushrooms to rimmed baking sheet, gill side up. Divide filling among mushrooms. Sprinkle remaining 6 tablespoons Parmesan cheese over and bake until heated through and cheese begins to brown, about 15 minutes.

Drizzle mushrooms with balsamic reduction and serve immediately.

Read Full Post »

Fall In The Park

I’m thankful for 60 degree weekend days and the fact that the snow hasn’t yet come falling.

I’m thankful for respite and a Saturday every once in a blue moon when we really can do nothing but exactly what we feel like doing.

Read Full Post »

Halfway

Today, Thursday, marks the halfway point til we meet Baby Panama.  Can’t believe this little one has been in me that long already … but I have a sneaking suspicion that the final 20 weeks are going to move by a lot slower than the first 20.  Something about me carrying 1.5 times my regular body weight or something.  Here’s what this baby is doing to me at the halfway point:

Just for commemorative purposes, let’s just make sure I remember what I looked like in July when Baby Panama was possibly just becoming.  Looking at these two photos side by side makes me want to cry a little.  Sometimes I like to cry a little bit just because.  Now, I don’t generally say, “Hey!  Somebody take a profile of me that highlights my stomach area,” so I don’t have a great shot.  But I think this photo is adequate for demonstration purposes.

I cry.

Read Full Post »

Salted Brown Butter Crispy Treats

Let’s just say that sometimes SmittenKitchen goes a little overboard with her raves and gushes.  Sometimes seriously overboard.

I got an e-mail notifying me it was my turn for snack night at home group.  I saw this e-mail at about 1am after cleaning up soup bowls, a soup splattered stove, coffee spills, and assorted mugs, glasses and napkins.  For once, no visions of 8-layer cakes or dipped sandwich cookies filled my head.  I wanted FAST.  I wanted EASY.  But I didn’t want boring.  A new, supposedly genius, riff on an old standby seemed perfectly in order.

As it turns out, they are perfectly in order.  After all, they got me through snack night, people snacked on them, and they were good.  But they weren’t “epic,” to quote Smitten.  The coarse sea salt did a nice flavor trick and the brown butter added a subtle textural difference, but subtle is right.  In fact, I’d be interested in polling my taste testers to see how many noted any deviation from the standard in their treats.

My assessment:  If you love rice crispy treats give these a whirl.  Why not?  But if you weren’t enamored with little air-filled puffs wrapped in sticky sugar originally, you probably won’t be any further enamored with these.

Salted Brown Butter Crispy Treats
Taken from smittenkitchen.com

Makes 16 2-inch squares or 32 1- x 2-inch small bars

4 ounces (1/4 pound or 1 stick) unsalted butter, plus extra for the pan
1 10-ounce bag marshmallows
Heaping 1/4 teaspoon coarse sea salt
6 cups Rice Krispies cereal (about half a 12-ounce box)

Butter (or coat with non-stick spray) an 8-inch square cake pan with 2-inch sides.

In a large pot, melt butter over medium-low heat. It will melt, then foam, then turn clear golden and finally start to turn brown and smell nutty. Stir frequently, scraping up any bits from the bottom as you do. Don’t take your eyes off the pot as while you may be impatient for it to start browning, the period between the time the butter begins to take on color and the point where it burns is often less than a minute.

As soon as the butter takes on a nutty color, turn the heat off and stir in the marshmallows. The residual heat from the melted butter should be enough to melt them, but if it is not, turn it back on low until the marshmallows are smooth.

Remove the pot from the stove and stir in the salt and cereal together. Quickly spread into prepared pan. I liked to use a piece of waxed or parchment paper that I’ve sprayed with oil to press it firmly and evenly into the edges and corners, though a silicon spatula works almost as well.

Let cool and cut into squares.

Read Full Post »

Fall Soup Night

I latched onto the idea of a soup night some time in July when the days were still hot and popsicles and slurpee runs were my best friend.  Still I was obsessed with the idea of a soup night some cozy Fall day when the winds were blowing and the daylight ended quickly.  I liked the idea of pots sitting on the stove simmering slightly, people coming and going on their schedule, and grabbing a bowl or three at some point in the night.

This weekend I finally got to fulfill my idea with a houseful of friends and three types of soup: Italian Sausage and Vegetable Soup, Meatball and Ravioli Soup, and Velvety Pumpkin Soup.  Never mind that Fall suddenly turned into summer and the day was a balmy 70 and sunny.  By the time night fell warm soup was still in order.  It was a nice, relaxing evening and I am really grateful for the fun and interesting people I have in my life.  I decided at the end of Fall Soup Night that even when I no longer live in a climate that rotates between four seasons I’m going to keep this tradition alive once a year and bring a little bit of Fall with me wherever I am.

(Of course Nate & I were both too relaxed to remember to pop out the camera once during the evening.)

Read Full Post »

Mah Momma’s Gra-nola

I thought I LOVED granola when I was little.  Then, one unfortunate furlough I ate boxed granola and discovered that I don’t love granola at all.  It’s dry and sawdust-like.  It’s rock hard in places and pale as regular ole oatmeal.  What I love is mah momma’s granola.

I loved the smell of the honey and butter mixing and melting in the electric skillet on our marble counter.  I loved the sound of my mom scraping the cooked clumps off the bottom with a wooden spoon.  I loved pulling down the cereal Tupperware and picking out the biggest, crunchy chunks for an afterschool snack.  I loved it every time, except maybe the one time I got sick at school and threw up a big bowl of granola right outside my classroom door.  It really wasn’t digested yet.  Pretty embarrassing for a ninth grader.

When I first got married, I tried to recreate this granola.  But it just wasn’t the same and the little oat flakes stayed separate and unclumped in a most annoying way.  Finally, I asked my mom the secret.  It turns out, the only real secret is to use about twice as much butter and twice as much honey as I had been using.  Oh yeah. Bless mah momma for never holding back on these two ingredients, despite the horror it must have caused her to know that what she was making was possibly closer to candy than cereal.

Read Full Post »